

Love Shrimp Pad Thai at your favorite Thai place? Make it at home with plump shrimp, tamarind-kissed noodles, and crunchy peanuts for that perfect sweet-sour balance. It’s quick, restaurant-style Pad Thai you can make any night of the week.
What goes in Shrimp Pad Thai?
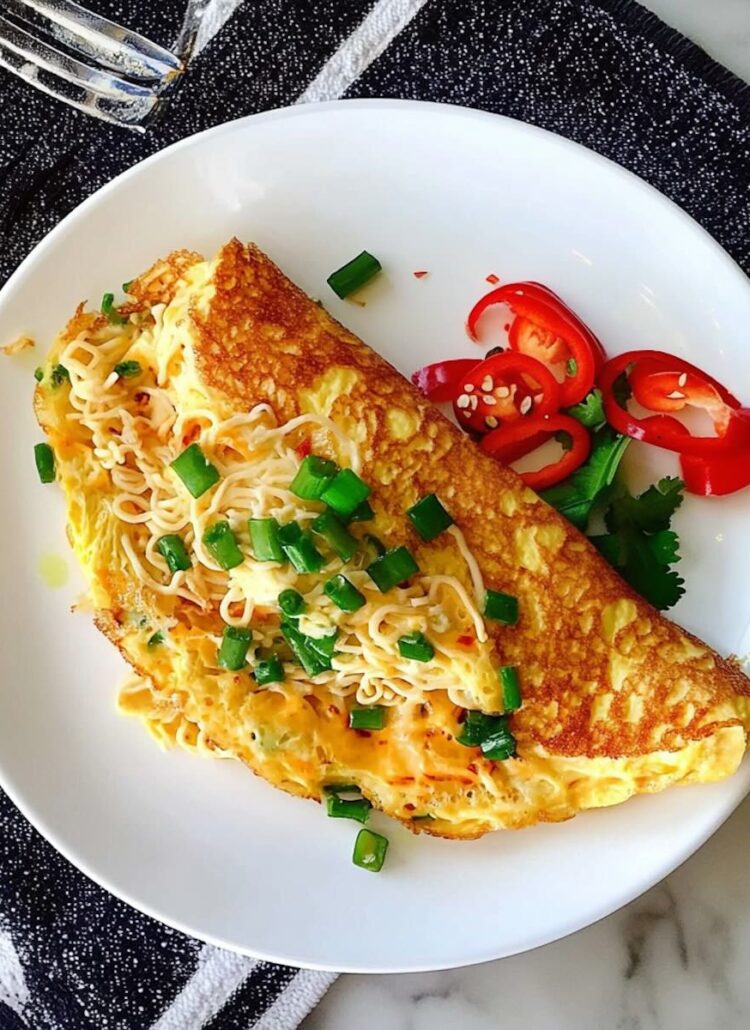
Shrimp Pad Thai is made with rice noodles stir-fried with shrimp, eggs, crispy tofu, bean sprouts, and green onions, all tossed in a tangy-sweet sauce of tamarind, fish sauce, and palm sugar. It’s finished with crunchy peanuts, lime, and Thai chili flakes for the perfect balance of flavors. Yum!
Fun fact: Most Thais never make Pad Thai at home, they go to a vendor instead! In Thailand, Shrimp Pad Thai is something most Thais just go buy at their favorite Pad Thai vendor, so you are learning something most Thais never make at home!
And if you love Thai noodles as much as I do, don’t miss my Chicken Pad See Ew that is my kids fav, Pad Thai Beef, which is my Thai Hubby’s fav way to eat Pad Thai, or Pad Woon Sen that is a Thai noodle hidden gem!
Want to dive deeper into what makes authentic Pad Thai so special? Check out my Complete Authentic Guide to Pad Thai where I share its history, ingredient substitutes, and the cooking secrets I teach in my Thai classes.
Why You’ll Love This Recipe
If you’ve ever had Shrimp Pad Thai at a restaurant and thought, “This is the best ever, I wish I could make this at home!” now you can dear! Here’s why my recipe will become your go-to:
- Authentic flavor – A Thai cooking class teacher, aka me Sherri!, will be teaching you how to use tamarind, palm sugar, and fish sauce give this Shrimp Pad Thai the legit street food taste.
- Quick to make – Once you prep your ingredients, Pad Thai cooks in just minutes!
- Cheaper than takeout – Skip the $15 or more you’d spend ordering it, and make it at home for way less!
Shrimp Pad Thai Ingredients You’ll Need
Noodles
16 oz. fresh rice noodles (or 16 oz. dry, medium-width rice noodles)– I prefer fresh since they are way easier to use! Look in the refrigerated section of your fav Asian market to find them. If you can only find dry rice noodles, make sure you soak them for at least an hour, and don’t boil them or they get gummy!

Pad Thai Sauce
Pro tip: If looking for legit Pad Thai, the sauce should always contain the trinity of tamarind concentrate, fish sauce and palm sugar!
1/2 of a tamarind block or 3/4 cup tamarind concentrate – I prefer to use a tamarind block and make my own tamarind concentrate since I can make sure it’s not watered down and maintains it’s tangy sour flavor. Use jarred tamarind concentrate if you don’t have time to make your own paste, but add carefully since it’s often thinner.
3/4 cup palm sugar, finely chopped – Thais prefer to use palm sugar as a sweetener, which is made from tapping the sap of coconut trees. It has a mild caramel cottony candy like flavor that my four kids all adore. If you prefer a less sweet Pad Thai, start with ½ cup palm sugar and ½ cup brown sugar and adjust to taste.
3/4 cup brown sugar – Adds another note of sweetness and makes it a more complex flavor than using just the palm sugar.
1/3-1/2 cup fish sauce – My favorite Thai sauce! Don’t be afraid of it even though it’s smelly! It’s magical, once you add it all you taste in your finished Pad Thai is the salty, savory umami powerhouse it brings to any Thai dish. Start with ⅓ cup fish sauce and taste the sauce. I usually use that amount for my cooking class. If you want, add more fish sauce up to ½ cup for extra savory depth.
1/2 cup water – Helps smooth out all the intense flavors.

Pad Thai Stir-Fry Ingredients
4–6 tablespoons coconut oil (or oil of choice) – Coconut oil adds richness and prevents sticking, and can handle a high heat.
6 garlic cloves, minced or smashed – Brings the signature garlicky punch.
2 shallots, finely chopped (optional) – Adds delicate sweetness and depth, but I often just leave it out, and put in only garlic like many Thai vendors do.
4 servings shrimp, peeled and deveined – The star of Shrimp Pad Thai! Use medium or large shrimp, tail on or off, depending on preference. In Thailand they often leave the tail on.
4 eggs, beaten – Scrambled into the noodles for extra protein and that classic Pad Thai bite.
2 cups Thai fried tofu, or extra firm tofu cut into strips (optional) – Always in authentic Pad Thai, but you can leave it out if you aren’t a tofu fan. Balances the shrimp with extra protein and texture. Frying helps it stay firm in the noodles.
1 cup fresh green onions, or Chinese garlic chives cut into 2-inch pieces – Garlic chives are traditional, but green onions are what I usually use since I can’t find Chinese garlic chives typically.
2 cup fresh bean sprouts – A must-have for crunch and freshness.
1/4 c. preserved radish, chopped (optional) – I actually can never find this at my Asian market and always leave it out, but if you can find it, it adds a salty-sweet crunch that’s classic in authentic Pad Thai.
Toppings to Have on the Table
Sugar – For those who like it a touch sweeter.
Dried Thai red chili pepper flakes – Adds customizable spice.
Crushed peanuts – Nutty crunch for balance.
Lime, quartered – A squeeze brightens all the flavors.
Extra bean sprouts & garlic chives – Fresh toppings for extra crunch.
How to Make Shrimp Pad Thai


Step 1: Soak the Noodles
If using 16 oz. fresh rice noodles, you can soak them in room-temperature water for about 30 minutes to help them cook faster, which is what I like to do, but not required if using fresh noodles. For 16 oz. dry rice noodles, never boil. Instead, soak in room-temperature water for about an hour until they wrap easily around your finger. Drain and set aside.
Step 2: Make the Sauce
If using ½ of a tamarind block, cover it in about 1 cup of warm water for 10 minutes to soften. Then press the pulp through a fine-mesh colander using a spatula or spoon, scraping the paste from the underside of the colander. Discard the seeds and fibers.
For the traditional Thai method, which is what I do, you can simply use your hands to squeeze out the pulp, make a paste, and throw away the seeds and fibers.
Measure out ¾ cup of the paste. Or, if you prefer the easiest route, use ¾ cup jarred tamarind concentrate.
Add the tamarind paste to a small pot with ¾ cup palm sugar, ¾ cup brown sugar, and ⅓ to ½ cup fish sauce. Start with ⅓ cup fish sauce, which is what most of my American cooking class students prefer, then add more to taste if you like it saltier. Stir over medium heat until the sugars dissolve. Taste and adjust as needed — more fish sauce for salty, more tamarind for sour, or more sugar for sweet.


Step 3: Cook the Aromatics and Shrimp
Important note: Only cook two servings of noodles at a time, so they do not get gummy from too much moisture. You will do this recipe in two batches.
To help keep the noodles from clumping, I like to cook the protein separately and set it aside. Heat 2 to 3 tablespoons coconut oil over medium high heat in a large cast iron skillet or wok. Add 3 garlic cloves, minced and 1 shallot, minced (optional), stirring until fragrant. Add all the shrimp (4 servings) and cook just until pink. Remove immediately to keep them tender, then set aside.
Step 4: Add the Eggs
Make sure everything is prepped and close to the stove since these next steps go quickly.
Turn the heat to high, add 2 tbsp or so of oil if needed, and toss in a little more garlic. Add 2 beaten eggs and scramble until set.
Step 5: Cook the Noodles
Add more oil if the pan looks dry, then add half the noodles (8 oz.) for that batch with a ladle of sauce. Keep noodles spread out and moving around the pan. I like to use a spatula in each hand to flip and separate them quickly so they do not clump.
Add sauce gradually so the noodles soak it up without getting soggy. Add a splash of water if needed until the noodles are tender but not mushy.

Step 6: Combine Everything
Once noodles are soft, add 1 cup fried tofu strips (optional), half the cooked shrimp, ½ cup green onions or garlic chives, cut into 2-inch pieces, 1 cup fresh bean sprouts, and 2 tablespoons pickled radish (optional). Toss quickly, then turn off the heat.
Repeat with the second batch. You might have some extra sauce left over. Store it in a jar in the fridge for up to 2–3 weeks, or freeze it for up to 3 months. Just give it a stir before using again.
Step 7: Serve with Toppings
Serve immediately and top with chopped peanuts, lime wedges, extra bean sprouts and green onions, and chili flakes if using.

Additions and Substitutions
- Rice Noodles Substitute: Glass noodles, which are in my Woon Sen Pad Thai and are a lighter version of Pad Thai, Korean sweet potato noodles, linguine, fettuccine, or spaghetti. Cook just until al dente so they don’t get mushy.
- Shrimp substitute: Chicken Pad Thai, Pad Thai Beef, pork or tofu work well.
- Fish sauce substitute: 2 ½ tablespoons soy sauce + 2 ½ tablespoons vinegar + a pinch of salt to replace ⅓ cup fish sauce or try my Vegan Pad Thai that uses a miso-based fish sauce substitute.
- Bean sprouts substitute: Fresh green beans cut into 2-inch pieces. Thai Hubby is from Sukhothai and they always put green beans in their Pad Thai in that area, so often we just use green beans since where we leave it can be hard to find fresh bean sprouts.
- Tamarind substitute: Mix ½ cup rice vinegar + ¼ cup lime juice.
- Palm sugar substitute: Use more brown sugar.
- Less sugar: Prefer less sugar? Start with half the sugar, then taste and adjust. Authentic Pad Thai balances sweet, sour, salty, and savory, and this sauce is for 6 servings, so the sweetness is spread out and balanced by tamarind and fish sauce. Try it as written first, then tweak if needed, or add more fish sauce as mentioned in the recipe.
- Dried shrimp (optional): Many Pad Thai vendors in Thailand add tiny dried shrimp for extra umami. I used to always skip them, but now I enjoy the depth of flavor they bring, but often can’t find them in America. If you find some, try adding a tablespoon or two to the stir-fry with the garlic.
Tips for the Best Shrimp Pad Thai
- Make ahead: The Pad Thai sauce and veggies can be prepped a day or two in advance. Store the sauce in the fridge and chopped veggies in containers, then stir-fry everything fresh when you’re ready to eat and it only takes a few minutes!
- Use a large cast iron or flat-surface pan to reduce noodle moisture.
- Cook shrimp separately to make sure you don’t have too much in the pan when cooking the noodles.
- Add sauce gradually, too much makes noodles soggy.
- Let everyone add their own toppings to taste since people love to customize!
Storing and Reheating Shrimp Pad Thai
Pad Thai is always best fresh from the pan, but if you have leftovers (or you make a little extra like I often do), here’s how to store them:
Fridge: Keep any leftover Shrimp Pad Thai in an airtight container for up to 3 days. The noodles will soften a little but still taste yummy.
Freezer: I don’t recommend freezing Pad Thai once the noodles are mixed with the sauce, since they can get mushy. But the Pad Thai sauce freezes beautifully! Store it in the fridge for up to 2-3 weeks, or freeze for up to 3 months.
Reheating: To reheat, toss the Pad Thai in a skillet with oil, a splash of water, or extra Pad Thai sauce and stir until warmed through. To learn more about how to reheat Pad Thai, check out my post and learn the top 3 ways!
Shrimp Pad Thai Frequently Asked Questions
Authentic Shrimp Pad Thai is made with rice noodles, shrimp, eggs, tofu, bean sprouts, garlic, chives or green onions, and a sauce of tamarind, palm sugar, and fish sauce, and sprinkled with chopped peanuts, and Thai red chili powder.
It’s a perfect balance of sweet, sour, salty, and savory. The tamarind adds tang, the fish sauce gives depth, the sugar balances it, and the peanuts and lime brighten each bite.
Rice noodles, eggs, garlic, tofu, pickled radish, shallots, bean sprouts, and Chinese garlic chives are often in it, but each vendor might make it a little different. The Pad Thai sauce is made of tamarind paste, fish sauce, and palm sugar. The traditional protein in Pad Thai is shrimp, but you can also use chicken, beef, or tofu. It’s topped with crushed peanuts and Thai chili flakes.
Balance! Tamarind for sour, palm sugar for sweet, and fish sauce for umami all work together, tossed with noodles, shrimp, eggs, and peanuts for layers of flavor.
Tamarind paste, fish sauce, and palm sugar in the sauce, using rice noodles, plus toppings like lime and peanuts, make it taste like true Thai street food.
Yes! Homemade Pad Thai following this recipe is naturally gluten free, but not always in the restaurants! Learn more on my Is Pad Thai Gluten-Free post!
Prep the sauce, chop veggies, and soak noodles ahead, but always cook fresh—the noodles don’t reheat well.
Great question! Check out my Pad Thai vs. Pad See Ew to learn all the secrets behind each dish!
Behind the Recipe

I’ll never forget the nights I’d race down the Skytrain’s steps in Bangkok, hoping to catch the red bus number 47 just as the driver squeaked open the doors. I’d gasp as I climbed aboard, all the Thais staring at this little white girl heading into the suburbs at 7:30 p.m., when most farangs stuck to the city streets.
Most foreigners probably wouldn’t spend an hour traveling outside of Bangkok after work just to see someone, knowing they had to work again the next day. But I wasn’t going to see just anyone. I was going to see my Thai boyfriend, who became my fiancé, and now is my Thai Hubby.
And I was going to eat some amazing Shrimp Pad Thai.
Across the street from his quaint studio apartment was a bustling market, a maze of vendors where we’d meander hand-in-hand with stars in our eyes. My favorite vendor was the Pad Thai lady. Legit Pad Thai isn’t everywhere in Thailand. If you want the most authentic version, you usually find it from street vendors, many of whom spend their whole lives cooking just Pad Thai until they’re renowned experts.
Our vendor was a woman with kind eyes, her wrinkled face glowing with sweat and smiles in the 110-degree heat. She always wore a dark blue visor, a bright flowery muumuu-style dress, and a strawberry-red apron. She’d often give me a long stare, like most vendors did, curious why a Thai guy was holding hands with a white foreign girl, something hardly seen in the suburbs—or even in Bangkok.
Her Pad Thai was perfect. The sauce wasn’t too sweet like some vendors’, and the noodles were never mushy or dry—just smooth, flavorful, and alroy mak (so delicious). The Thai fried tofu was golden and crispy. Back then, I never liked the tiny dried shrimp you find in authentic Pad Thai (even though I love them now), so Thai Hubby would always ask her to leave them out, rolling his eyes at my silly American ways.
She’d slide the steamy noodles into a small styrofoam container, top it with banana fronds and fresh garlic chives, and hand it over in a little white plastic bag. Thai Hubby and I would carry it across the street and eat Thai-style on the floor of his apartment. The scent of tamarind perfumed the air as we ate, my heart pitter-pattering as I gazed at my strong, sweet, handsome Thai man.
As the night wound down, he’d would walk me to the bus stop. We’d wait under the bright city lights, sweat dripping in the heat, until the bus arrived. After a kiss goodbye, I’d climb the steps and watch him disappear into the night as the bus carried me back to Bangkok. Looking out the smudged window, my heart always felt heavy. I never wanted to leave him.
And now my wish came true, I married that Thai Boyfriend and he became Thai Hubby—and I didn’t even have to leave the Pad Thai behind either! I now make it for us in our log cabin in Boone, and we still eat it romantically, now at a big farm table with our four kiddos around us, but my heart still pitter-patters when I look at my strong, sweet, handsome Thai Hubby.
Final Thoughts
I know many Americans love Pad Thai, and it’s one of their favorite Thai dishes, so I hope this Shrimp Pad Thai recipe helps you make it at home! And did you know that Pad Thai is naturally gluten free? I love how everyone can feast at the Pad Thai table.
I learned some of the best Pad Thai methods through the amazing five-part Pad Thai series on shesimmers.com. If you want even more in-depth descriptions of Pad Thai techniques, check it out!
Want to dive deeper into other Thai noodle dishes? Here you go, dear:
- Pad Thai vs Pad See Ew: Which Thai Noodle Dish Is Right for You?
- Pad See Ew vs Pad Kee Mao: Key Differences Explained
- Chicken Pad See Ew Recipe
- Drunken Noodles with Chicken Recipe
And if you’d like to learn how to make Pad Thai in person, come to my Thai cooking class in Boone, NC! My Shrimp Pad Thai recipe is always on the menu.
Have fun making it, share your creations with me on Instagram @thaifoodie!
Want to Try Another Pad Thai?
- Pad Thai Sauce – make-ahead base for any version
- Chicken Pad Thai – probably the most ordered Thai dish in America
- Beef Pad Thai – fav for all the beef lovers like Thai Hubby
- Woon Sen Pad Thai – lighter twist with glass noodles
- Vegan Pad Thai with Tofu – made with a miso-based vegan fish sauce

Shrimp Pad Thai Recipe
- Total Time: 45 minutes
- Yield: 4-6 1x
- Diet: Gluten Free
Description
Love ordering Pad Thai at your favorite Thai restaurant? Now you can make Shrimp Pad Thai at home! Easier, more affordable, and even more delicious than the one at your fav Thai place!
Ingredients
Noodles
-
16 oz. fresh rice noodles (or 16 oz. dry, medium-width rice noodles)
Pad Thai Sauce
-
½ of a tamarind block or ¾ cup tamarind concentrate
-
½ cup water
-
¾ cup palm sugar, finely chopped
-
¾ cup brown sugar
-
⅓–½ cup fish sauce
Pad Thai Stir-Fry Ingredients
-
4–6 tablespoons coconut oil (or oil of choice)
-
6 garlic cloves, minced or smashed
-
2 shallots, finely chopped (optional)
-
4 servings shrimp, peeled and deveined
-
4 eggs, beaten
-
2 cups Thai fried tofu, or extra firm tofu cut into strips (optional)
-
1 cup fresh green onions, or Chinese garlic chives, cut into 2-inch pieces
-
2 cups fresh bean sprouts
-
¼ cup preserved radish, chopped (optional)
Toppings
- Sugar
- Dried Thai red chili pepper flakes
- Crushed peanuts
- Lime, quartered
- Extra bean sprouts and green onions
Instructions
Step 1: Soak the Noodles
If using 16 oz. fresh rice noodles, you can soak them in room-temperature water for about 30 minutes to help them cook faster, which is what I like to do, but not required if using fresh noodles. For 16 oz. dry rice noodles, never boil. Instead, soak in room-temperature water for about an hour until they wrap easily around your finger. Drain and set aside.
Step 2: Make the Sauce
If using ½ of a tamarind block, cover it in about 1 cup of warm water for 10 minutes to soften. Then press the pulp through a fine-mesh colander using a spatula or spoon, scraping the paste from the underside of the colander. Discard the seeds and fibers.
For the traditional Thai method, which is what I do, you can simply use your hands to squeeze out the pulp, make a paste, and throw away the seeds and fibers.
Measure out ¾ cup of the paste. Or, if you prefer the easiest route, use ¾ cup jarred tamarind concentrate.
Add the tamarind paste to a small pot with ¾ cup palm sugar, ¾ cup brown sugar, and ⅓ to ½ cup fish sauce. If you prefer a less sweet Pad Thai, start with ½ cup palm sugar and ½ cup brown sugar and adjust to taste. Start with ⅓ cup fish sauce since that is what most of my American cooking class students prefer, then add more to taste if you like it saltier. Stir over medium heat until the sugars dissolve. Taste and adjust as needed, more fish sauce for salty, more tamarind for sour, or more sugar for sweet.
Step 3: Cook the Aromatics and Shrimp
Important note: Only cook two servings of noodles at a time, so they do not get gummy from too much moisture. You will do this recipe in two batches.
To help keep the noodles from clumping, I like to cook the protein separately and set it aside. Heat 2 to 3 tablespoons coconut oil over medium high heat in a large cast iron skillet or wok. Add 3 garlic cloves, minced and 1 shallot, minced (optional), stirring until fragrant. Add all the shrimp (4 servings) and cook just until pink. Remove immediately to keep them tender, then set aside.
Step 4: Add the Eggs
Make sure everything is prepped and close to the stove since this step goes quickly.
Turn the heat to high, add 2 tbsp or so of oil if needed, and toss in half of the garlic and shallots. Add 2 beaten eggs and scramble until set.
Step 5: Cook the Noodles
Add more oil if the pan looks dry, then add half the noodles (8 oz.) for that batch with a ladle of sauce. Keep noodles spread out and moving around the pan. I like to use a spatula in each hand to flip and separate them quickly so they do not clump.
Add sauce gradually so the noodles soak it up without getting soggy. Add a splash of water if needed until the noodles are tender but not mushy.
Step 6: Combine Everything
Once noodles are soft, add 1 cup fried tofu strips (optional), half the cooked shrimp, ½ cup green onions or garlic chives, cut into 2-inch pieces, 1 cup fresh bean sprouts, and 2 tablespoons pickled radish (optional). Toss quickly, then turn off the heat.
Repeat with the second batch. You might have some extra sauce left over. Store it in a jar in the fridge for up to 2–3 weeks, or freeze it in portions for up to 3 months. Just give it a stir before using again.
Step 7: Serve with Toppings
Serve immediately and top with chopped peanuts, lime wedges, extra bean sprouts and green onions, and chili flakes if using.
Notes
Additions and Substitutions
- Rice Noodles Substitute: Glass noodles (woon sen) are used in this Woon Sen Pad Thai for a lighter version of Pad Thai. You can also use Korean sweet potato noodles, linguine, fettuccine, or spaghetti—just cook until al dente so they don’t get mushy.
- Shrimp substitute: Chicken Pad Thai, Pad Thai Beef, pork or tofu work well.
- Fish sauce substitute: 2 ½ tablespoons soy sauce + 2 ½ tablespoons vinegar + a pinch of salt to replace ⅓ cup fish sauce. For a vegan version that uses a miso-based fish sauce substitute, see my Vegan Pad Thai post.
- Bean sprouts substitute: Fresh green beans cut into 2-inch pieces. Thai Hubby is from Sukhothai and they always put green beans in their Pad Thai in that area, so often we just use green beans since where we leave it can be hard to find fresh bean sprouts.
- Tamarind substitute: Mix ½ cup rice vinegar + ¼ cup lime juice.
- Palm sugar substitute: Use more brown sugar.
- Less sugar: Prefer less sugar? Start with half the sugar, then taste and adjust. Authentic Pad Thai balances sweet, sour, salty, and savory. This sauce makes 6 servings, so the sweetness is spread out and balanced by tamarind and fish sauce. Try it as written first, then tweak if needed, or add more fish sauce as mentioned in the recipe.
Tips for the Best Shrimp Pad Thai
- Make ahead: The Pad Thai sauce and veggies can be prepped a day or two in advance. Store the sauce in the fridge and chopped veggies in containers, then stir-fry everything fresh when you’re ready to eat. It only takes a few minutes!
- Use a large cast iron or flat-surface pan and move the noodles quickly around to reduce noodle moisture.
- Cook shrimp separately to make sure you don’t have too much in the pan when cooking the noodles.
- Add sauce gradually, too much makes noodles soggy.
- Let everyone add their own toppings to taste since people love to customize!
- Prep Time: 30 minutes
- Cook Time: 15 minutes
- Category: Thai
- Method: Stir-Fry
- Cuisine: Thai
This post contains links to affiliate websites, such as Amazon, and we receive an affiliate commission for any purchases made by you using these links. We appreciate your support!


If i can’t find any tamarind paste in Jackson Hole, is there anything I can substitute, or a mixture I could whip up?
Great question Erin! The tamarind paste is the sour flavor in pad thai sauce, so I would recommend using lime juice if you can’t find tamarind. You can order it on Amazon too!
Sherri – this recipe is absolutely delicious! Would recommend it and your cooking classes (where we first learned to make this Pad Thai) to anyone! 🙂
Yay! So glad you enjoyed the recipe Laura and for your kind words! 🙂
Love making our fav Thai noodle dish at home with this easy to understand recipe!
Wow, this Shrimp Pad Thai looks absolutely mouthwatering! The balance of sweet, sour, and salty in your sauce sounds spot-on. The detailed instructions and tips make it feel like an authentic street food experience. Can’t wait to try it myself!
At Mekhala Living, we love celebrating the bold, balanced flavors of Thai cuisine too. This recipe is exactly the kind of dish we enjoy making at home—simple yet bursting with flavor! Thanks for sharing such a gem of a recipe!
Thanks so much for your kind comment!